Complete CPR Instructor Packages in Canada: What’s Included and How to Get Started
Becoming a CPR instructor in Canada blends two worlds: pedagogy and preparedness. You need to know how to teach people at different comfort levels, and you need the right equipment to run classes that meet national guidelines, survive heavy use, and travel well. If you are weighing whether to buy a complete instructor bundle or assemble your own kit, a clear picture of what a proper package looks like will save you time and money, and help you avoid the headaches that come with mismatched gear.
This guide lays out what a complete package typically includes, what separates durable gear from disposable gadgets, where Canadian requirements shape your choices, and how to start teaching without racking up sunk costs.
The Canadian context that shapes your kit
Instructor certification and training standards in Canada come primarily through national organizations such as the Heart and Stroke Foundation of Canada, the Canadian Red Cross, and the Lifesaving Society. Each has its own instructor pathways, course outlines, and equipment expectations. Workplaces also look for courses accepted by provincial regulators, such as WorkSafeBC, Alberta OHS, and Ontario’s WSIB. If you plan to deliver workplace-approved first aid, confirm the course provider and level that meets the provincial requirement where your clients operate.
For equipment, Health Canada classifies clinical AEDs as medical devices. In a classroom you typically use AED trainers, not live defibrillators, so you are not navigating the same regulatory space. That said, when you add an actual AED for demonstration purposes, check the device’s licensing status and service plan. Many organizations appreciate a brief talk about placement, maintenance, and public access programs, and you do not want to contradict the facility’s policy.
Finally, Canada means winter, distance, and language. If you teach in Quebec or the territories, bilingual AED trainer prompts and French participant manuals are more than nice to have. If you fly into remote communities, your kit’s size and ruggedness matters as much as what’s inside it. Frozen parking lots and slushy hallways are hard on flimsy wheels, and I have watched more than one bargain suitcase give up mid-season.
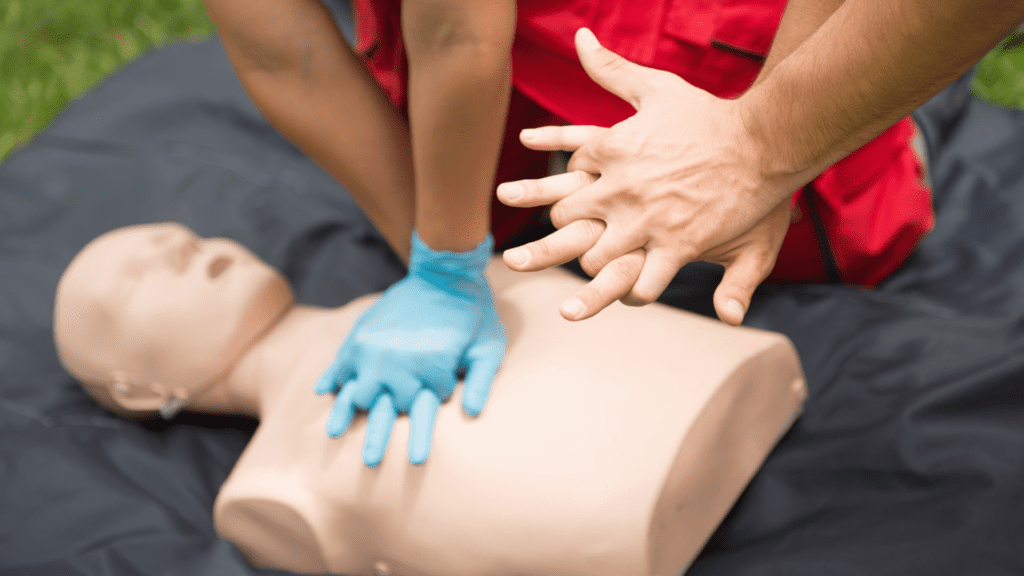
What a “complete” CPR instructor package really includes
Most CPR instructor packages in Canada share a core structure: adult and child training manikins with feedback, AED training equipment with realistic prompts and pads, barrier devices for hygiene, and a durable way to move and sanitize everything between classes. The better bundles also add spares and consumables, so you do not run out of faces, lungs, or pads during a busy week.
A compact starter set for small classes often includes two adult torsos, one infant manikin, one AED trainer, and a consumables pack. That works for classes up to six people if you rotate stations. A full instructor kit leans closer to four adult manikins, two infants, two AED trainers, plus spares, which lets you run groups of 8 to 12 without bottlenecks. For blended-learning refreshers, you can stretch ratios further, but people learn by doing, and long waits erode engagement.
Manikins are the heart of the kit. The current standard in many programs expects feedback on compression rate and depth. Whether that comes through lights on the chest, audible clicks, or a Bluetooth app, the point is simple: learners should know when they are within the target 100 to 120 compressions per minute and roughly 5 cm depth on adults. Feedback devices reduce instructor fatigue too. Instead of hovering over every pair, you can watch the room and step in when a student plateaus.
AED trainers vary widely. The cheap ones beep and show a single rhythm. The good ones let you select shockable or non-shockable scenarios, adjust delays, and switch between adult and child pads. They have clear, bilingual voice prompts, volume control for noisy gyms, and replaceable pads that do not leave residue on your manikins. If you have taught through a busy winter term, you have seen pads curl at the edges or lose stick mid-class. A trainer that accepts affordable replacement pads pays for itself quickly.
Then there is the less glamorous gear: face shields, one-way valves, nitrile gloves, cleaning supplies, and batteries. A seasoned instructor’s bin always has extras. I keep spare lungs and faces in labelled zip bags, a roll of painter’s tape for marking positions on carpet, and a lint roller because classroom carpet strands will find their way into every airway port. Small touches like that cut setup time and keep sessions tight.
Choosing the right CPR training manikins for Canada
When you shop CPR training manikins in Canada, you are balancing three things: realism, durability, and serviceability. Realism means correct chest resistance, head tilt, visible chest rise, and anatomical landmarks that help you teach hand placement. Durability shows up in the joints, the skin material, and how the airway bags or cylinders handle heavy use. Serviceability is whether you can get parts quickly and affordably.
Here is what experience has taught me to look for:
-
Compression feedback you can trust. Some manikins click, some use LEDs, some pair with an app. The method matters less than consistency. If the target rate lights jump around, learners fixate on the device rather than their technique. Most instructors find that LED chests are easiest for group coaching, while app-based reporting is useful in BLS-level courses or instructor candidates’ evaluations.
-
Consumables that match your budget and schedule. Respiratory systems range from simple lungs you swap per learner to antimicrobial airways rated for multiple uses with disinfection. In high-volume community classes, disposable lungs keep hygiene straightforward. In smaller corporate groups, you can disinfect between learners. Factor cost and turnaround time for replacements, especially if you teach far from major couriers.
-
Skins that tolerate real classroom life. Vinyl skins wipe clean easily, but some react poorly to aggressive disinfectants. Quaternary ammonium compounds can cloud cheaper finishes. A neutral detergent followed by 70 percent isopropyl alcohol usually keeps things safe, and manufacturers publish care guides. If your calendar includes back-to-back sessions, select a material that dries fast to avoid damp chests when the next group kneels down.
-
Practical anatomy on infant manikins. A good infant trainer makes hand positioning obvious and supports two-thumb technique. The head and neck should allow clear airway demonstrations without “fighting” the hinge. New instructors often over-extend the neck on rigid models, which confuses learners in real scenarios.
On cost, expect a single adult feedback manikin to range from roughly 350 to 900 CAD depending on features and brand. Infant units generally cost a bit less. Package pricing usually drops the per-unit cost and adds a carrying case.
Picking AED training equipment that earns its keep
Look for AED trainers that mirror what your learners see in public facilities. If you teach healthcare providers, familiarity with common clinical models helps, but for lay responders focus on clear prompts, pad placement practice, and safe rhythm scenarios.
The better AED trainer features for Canadian classes include bilingual English and French prompts, volume control, realistic analysis delays, and child mode without swapping cables. If you train in community centers and arenas, you will encounter ambient noise. A whisper-quiet trainer frustrates everyone. On the other hand, max volume in a boardroom turns your scenario into an interruption. Flexibility matters.
Pad quality is not trivial. Replacement pads run from 25 to 60 CAD a set. Low-tack adhesives slide on manikin skin, high-tack leave residue. Over time, residue causes pads to lift at the edges. I rotate two sets per unit and store them in sealed bags to extend life. Rechargeable internal batteries lower long-term costs, but swappable AA or AAA cells keep you running when someone forgets to plug in after class. Expect to pay 200 to 500 CAD for a solid trainer with spare pads in the box.
Instructors often debate whether to carry a real AED for demonstration. If you do, keep it distinct from the trainers and manage it like any installed device: dated pads, spare battery, weekly self-test checks. Learners are naturally curious. Place live units out of reach when not in active demo to avoid accidental alarms.
What does a full package cost in practice?
For a small independent instructor covering community and workplace classes, a practical starter kit with two adult manikins, one infant, one AED trainer, consumables, and a rolling case typically lands between 1,800 and 3,200 CAD. A more versatile set with four adult manikins, two infants, two AED trainers, a bag-mask, extra lungs and valves, spare pads, and sanitation supplies often falls in the 3,500 to 5,500 CAD range. Shipping to remote or northern locations adds to that, sometimes significantly, so ask vendors about dimensional weight and winter surcharges.
Prices fluctuate with exchange rates and supply chain cycles. I have seen pad availability tighten during fall spikes, and a backorder on one consumable can sideline a kit. If you teach year-round, keep a three-class buffer on disposables and replace items in batches rather than just in time.
Hygiene and maintenance that hold up under scrutiny
Learners notice how you manage hygiene. After the pandemic years, many are sensitive to shared equipment. A clear routine reassures participants and keeps classes moving.
Between learners, disinfect face areas and replace, clean, or shield the airway according to the manufacturer’s guidance. Some instructors use individual face shields with one-way valves for breaths, then swap valves while leaving a manikin face in place. Others prefer individual replaceable faces and a shared airway. Both approaches work if you are consistent.
Plan your cleaning for speed. Keep a labelled bin with gloves in multiple sizes, pre-sliced rolls of paper towel, and wipes approved for your specific manikin material. Alcohol works for most, but not all, and overspray on LED panels can fog the plastic. Store your cleaning supplies in cold-resistant containers if you travel in winter. I learned that lesson after leaving a spray bottle in a trunk at minus 20; the next morning, the trigger assembly cracked and the bottle leaked into the case.
Manikins and AED trainers generally carry one to three-year warranties. Register your products to streamline claims. Small cracks in chest plates and failing clickers sneak up over time, so do a monthly inspection, not just a wipe down. Keep a simple log for pad counts and lung replacements. It takes two minutes after class and will save you from pulling a box with only one set of child pads left as a dozen parents walk in.
The business layer many new instructors overlook
Equipment gets you in the room, but you also need the paperwork and process behind it. If you plan to run paid courses, talk to your insurer. Many carriers offer policies bundling professional liability with general liability for instructors, often starting near 2 million CAD coverage limits as a baseline. Your venue may ask for proof and an additional insured certificate.
If your annual revenue will exceed the small supplier threshold, register for GST/HST (and PST where applicable) and set up a simple invoicing system that shows tax lines clearly. Nothing sours a post-class vibe like a surprise tax conversation.
In some provinces, particular first aid courses must be delivered by approved providers to count toward workplace requirements. If you lead with CPR-only classes, demand may come from community groups, gyms, teams, and families. If you add emergency or standard first aid, you can serve more employers. Study the provincial lists so your marketing aligns with what clients need.
Class design, ratios, and how your kit supports learning
The number of manikins and trainers you carry dictates how you run the room. With a 2:1 student-to-manikin ratio, you can rotate roles smoothly: compressions, breaths, coach. With 3:1, you shorten practice sets and draw firmer lines on feedback. Learners still get hands-on https://pastelink.net/2rlwyo1s time, but you, as the instructor, must stage scenarios tightly and watch for those who hide at the edge of the group. BLS and professional responder classes benefit from a lower ratio, especially for infant skills and two-rescuer sequences.
Realistic AED practice changes the tone of a lesson. Many people do not realize how strongly the voice prompts drive actions. Running one scenario where the trainer advises no shock and instructs immediate compressions shows that an AED does not solve the whole problem. Tie that into good pad placement, chest exposure with respect, and making room around the patient before analysis. You are not just teaching button presses; you are teaching scene control.
I carry painter’s tape to outline a patient on the floor when space is tight. It shows where team members should stand during compressions and ventilation, and it helps learners avoid shuffling into a cluster around the chest. A roll costs a few dollars, weighs nothing, and saves you three explanations.

Sourcing emergency training equipment in Canada
When you are ready to buy, you will find Canadian distributors who specialize in emergency training equipment Canada wide, from regional shops that know local school boards to national suppliers with bilingual materials. The benefit of buying within Canada is twofold: shorter shipping times and no surprise duties. You also access Canada-specific warranty support.
Ask about bundle customization. Off-the-shelf CPR instructor packages Canada vendors sell may include four identical adult manikins. In practice, a mix of three adults and one infant per case helps more. You can also request bilingual AED trainer overlays, French manuals, and spare parts kits tuned to your class mix. When a vendor understands your course calendar, they can suggest rotation plans for consumables, something that rarely appears on a price list.
If you teach in remote or Indigenous communities, discuss transport cases and weight. A hard case with true locking latches and large wheels pays for itself the first time you pull over slush. Soft duffels are lighter but soak through quickly and can snag on metal lips at arena doors. I have switched to hard-side cases for winter travel and kept duffels only for downtown venues where elevators and carts help.
Two quick frameworks: what to buy and how to launch
Here is a concise equipment checklist that fits most independent instructors starting out. Adjust up or down based on expected class size and course type.
- Four feedback-enabled adult manikins, two infant manikins, with spare lungs and faces
- Two AED trainers with bilingual voice prompts, adult and child pads, plus two spare pad sets
- CPR and first aid training kits: barrier masks with one-way valves, nitrile gloves, pocket masks, bag-mask
- Sanitation and maintenance: approved wipes, 70 percent isopropyl alcohol, disposable towels, tool kit for minor repairs
- Transport and setup: rolling hard case, painter’s tape, extension cord, projector adapter, laminated skill check cards
Once your gear plan is set, get your teaching pathway in order. Most instructors follow a similar sequence, no matter which training agency they choose.
- Choose your certifying organization and complete the instructor course that matches your target audience, such as BLS, CPR C, or emergency and standard first aid
- Assist or co-teach the required number of classes, then schedule your monitoring session to be formally recognized as an instructor
- Register as a training partner if applicable, or affiliate with one that supplies participant materials, certificates, and administrative support
- Set up your business basics: insurance, booking process, GST/HST registration if needed, bilingual materials if you work in Quebec or with federal departments
- Pilot your first classes with friendly organizations to refine timing, room layouts, kit flow, and equipment sanitation routines
Keep both lists lean on purpose. If a step or item is not obvious, dig into it before your first paid course. When in doubt, talk to an experienced instructor in your region. The Canadian community is collegial, and most of us remember our first class jitters and the scramble for missing valves.
Common pitfalls and how to dodge them
Two recurring problems come up in early months. First, underestimating consumables. A full evening class with vigorous practice can burn through two sets of lungs per manikin if you replace them between stations and scenarios. Plan your orders in batches and mark boxes with bright tape by size and type. Second, buying AED trainers that do not match the skill level you teach. An advanced unit with complex scenarios is not helpful for a group of parents who want the confidence to act. Likewise, a single-speed beeper frustrates paramedic students.
Another sleeper issue is bilingual needs. Federal workplaces, airlines, and anything connected to Quebec may require French materials. Even outside Quebec, bilingual AED training equipment Canada sourced units ease anxiety for francophone learners. I have had classes where half the participants silently nodded through English prompts but came alive when the trainer repeated instructions in French.
Finally, think about timing. The busiest seasons for CPR and first aid tend to be late summer to mid-fall and late winter into spring. If you plan a launch, aim for the shoulder weeks just before a rush. It gives you time to iron out logistics without fighting every other instructor for shipping slots and venue bookings.
Where CPR and first aid training kits save your day
The phrase CPR and first aid training kits sounds generic, but the right bundle matters when something breaks mid-class. One evening, a student practicing with enthusiasm cracked a chest spring on an older manikin. The class was rolling, and the clock was ticking. Because I carried a small kit with a spare plate and basic tools, I swapped the part during a water break and lost maybe three minutes. Without that, the rest of the night would have felt thin.
Your training kit should have enough redundancy that a single failure does not derail a session. Redundancy does not mean carrying two of everything at all times. It does mean a second AED trainer if the first glitches, a spare valve set, extra pads, and the small parts unique to your manikins. Know which screws strip easily and which clips pop off under stress. Those details are the difference between a professional operation and a scramble.
Evaluating package offers from Canadian vendors
When you compare CPR instructor packages Canada distributors advertise, look past the headline number. Ask what is truly included. Are the manikins feedback-enabled to the standard your program expects? How many sets of lungs and faces come in the box? Are the AED trainer pads adult-only, or do you get child pads too? Is the case a soft duffel, a semi-rigid roller, or a hard case? How long is the warranty, and who handles it in Canada?
Request photos of the exact items, not catalogue images, and check availability. If a key component is backordered, negotiate a partial shipment so you can start co-teaching while you wait. Also, confirm return policies. Most reputable suppliers accept returns on unopened items within a set window, but consumables are often final sale.
Do not ignore shipping realities. Western Canada to Atlantic Canada is a long logistic path, and winter storms delay everything. Build in a cushion and keep your calendar flexible until your kit is in your hands.
Teaching tips that make your equipment shine
A final note on technique. Your equipment will not teach for you, but it can amplify your approach. Use manikin feedback lights to set friendly competitions, like who can keep the green zone the longest without looking down. With AED trainers, deliberately run a no-shock scenario, then a battery-failure scenario, and have learners articulate what they would do next. Those moments cultivate problem-solving rather than rote behavior.
Rotate students through roles quickly and switch partners at least once. People default to comfort zones, and in a real emergency, they may not be with their best friend. Vary the surfaces you kneel on. If you only ever teach on soft gym mats, the first time someone leans over a patient on a hard tile floor, their technique shifts. A simple folded towel under the knees is a courtesy that keeps focus on skills, not discomfort.
The bottom line
A complete instructor package is not just a box of gear. It is a system that lets you set up fast, teach clearly, disinfect responsibly, and pack out without drama. Buy CPR training manikins Canada suppliers can service, choose AED training equipment Canada wide that matches your learners and offers bilingual prompts where needed, and round it out with emergency training equipment Canada instructors rely on: consumables, sanitation, and a rugged case. Start with a realistic class size, invest in redundancy where it counts, and build relationships with a certifying body and a responsive vendor. If you keep your eye on those fundamentals, your courses will run smoothly and your students will leave ready to act when it matters.
CPR Depot Canada — Business Info (NAP)
Name: CPR Depot CanadaAddress: 340 Croft Dr, Tecumseh, ON N8N 2L9
Phone: +1-877-570-7322
Website: https://cpr-depot.ca/
Email: [email protected]
Hours:
Monday: 9:00 AM – 6:00 PM
Tuesday: 9:00 AM – 6:00 PM
Wednesday: 9:00 AM – 6:00 PM
Thursday: 9:00 AM – 6:00 PM
Friday: 9:00 AM – 6:00 PM
Saturday: Closed
Sunday: Closed
Open-location code (Plus Code): 8537+C8 Tecumseh, Ontario
Map/listing URL: https://www.google.com/maps/place/CPR+Depot/@42.3036,-82.8392601,17z/data=!3m1!4b1!4m6!3m5!1s0x883b2aedd5f271a1:0xfee6f8b7ab8f4110!8m2!3d42.3036!4d-82.8366852!16s%2Fg%2F1q6cff15h
Embed iframe:
Socials:
https://www.facebook.com/people/CPR-Depot-Inc/61575911496200/ https://www.instagram.com/cprdepotinc/ https://www.youtube.com/@CPRDepot
https://cpr-depot.ca/
CPR Depot Canada is a supplier of medical training products and related supplies serving customers across Canada.
The business is listed at 340 Croft Dr, Tecumseh, ON N8N 2L9.
To contact CPR Depot Canada, email [email protected] or call +1-877-570-7322.
Hours listed are Monday–Friday 9:00 AM–6:00 PM, with Saturday and Sunday closed.
For directions and listing details, use: https://www.google.com/maps/place/CPR+Depot/@42.3036,-82.8392601,17z/data=!3m1!4b1!4m6!3m5!1s0x883b2aedd5f271a1:0xfee6f8b7ab8f4110!8m2!3d42.3036!4d-82.8366852!16s%2Fg%2F1q6cff15h
Popular Questions About CPR Depot Canada
Where is CPR Depot Canada located?CPR Depot Canada is listed at 340 Croft Dr, Tecumseh, ON N8N 2L9.
What are the hours for CPR Depot Canada?
Hours listed: Monday–Friday 9:00 AM–6:00 PM; Saturday and Sunday closed.
What does CPR Depot Canada sell or provide?
CPR Depot Canada supplies medical and first aid training products and related equipment (product availability varies).
Do they ship across Canada?
The business markets to Canadian customers and operates as a Canada-wide supplier; confirm shipping options at checkout or by contacting [email protected].
How can I contact CPR Depot Canada?
Phone: +1-877-570-7322
Email: [email protected]
Website: https://cpr-depot.ca/
Map: https://www.google.com/maps/place/CPR+Depot/@42.3036,-82.8392601,17z/data=!3m1!4b1!4m6!3m5!1s0x883b2aedd5f271a1:0xfee6f8b7ab8f4110!8m2!3d42.3036!4d-82.8366852!16s%2Fg%2F1q6cff15h
Landmarks Near Tecumseh, ON
1) Tecumseh Town Hall2) Lacasse Park
3) Lakewood Park
4) WFCU Centre (Windsor)
5) Devonshire Mall (Windsor)